Get your life together with the Nifty Organization Journal: bit.ly/2AYkXm2
Here is what you'll need!
Adding Storage Space In Your Small Living Room
1. Hidden remote storage
Keep your remotes from cluttering your living room by hiding them under your coffee table. Attach one side of a velcro strip to the back of your remotes and the other half to the underside of your coffee table.
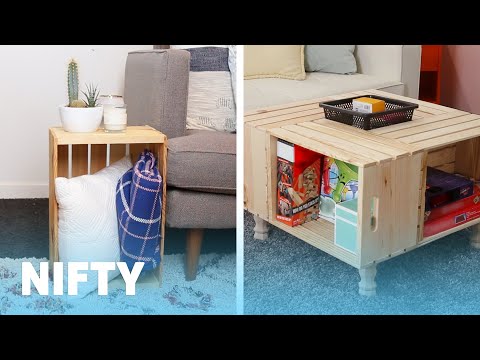
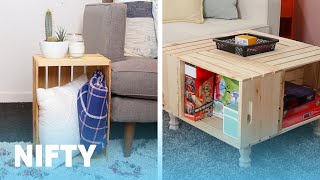
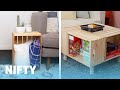
2. Make a simple side table
Upcycle a crate as a cute but functional side table. Store things like extra pillow, blankets and books in the lower shelf, and use the top as a convenient table top surface.
3. DIY Rope basket
Materials
Cardboard box
Twine
Hot glue
Large pillow case
Instructions
1. Ensure the bottom of the cardboard box is secure. If necessary, add tape. Push the flaps of the box inside to create and open box.
2. Starting at the bottom of the box, apply a small amount of hot glue and attach the end of the twine. Carefully add lines of hot glue to box and attach the twine, working upwards. Continue to loop twine around the box until it’s a few inches away from the top.
3. Cuff a pillowcase halfway down or until you reached the desired size for the lining of your box.
4. Line the box with the pillowcase, covering the exterior cardboard.
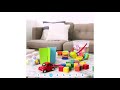
4. Finally get board games organized
Tidy up your board games and puzzles by stacking them in pot organizers.
5. File holder shelf
Turn a wooden file holder into a shelf by drilling it sideways into a corner wall. Use your new makeshift shelves for magazines, remote controls, extra blankets, or knick knacks if you're tight on space and want some custom storage space.
6. DIY sofa table
Materials
1 plank wood, equal to length of couch
4 staircase spindles cut to height of couch
8 “L” brackets
Jigsaw
Sanding paper
Wood stain
1 extension outlet
Instructions
1. Place the outlet on one of the ends of the plank and trace the perimeter.
2. Use your jigsaw to cut out that square you traced.
3. Use the L brackets to attach the 4 “legs” (spindles) to your table.
4. Stain or paint the entire table.
5. Once dry, put the outlet into the hole you made in the plank. It should be tight enough that the outlet does not fall through.
7. DIY Wine Crate Coffee Table
Materials
4 wine crates
1 square peg board (27"x27" or the size of your table)
4 6-inch table legs
Wood glue
Clamps
Strong tape
Sandpaper
Wood stain (optional)
Instructions
Arrange four wooden crates together on their sides, with the openings facing out (creating shelving).
There should be a small empty space at the center. Glue the sizes together with wood glue, and secure with tape until dry. Cover the top with wood glue, and lay the peg board down, clamping it into place.
Place a ring of wood glue on the tops of each table leg, and push them into the corners of the peg board. Let dry overnight.
Sand down all corners and edges of your table. Wipe away dust with a damp cloth. If desired, you can add two coats of stain to give it a finished look, or to match other furniture.
Enjoy you new coffee table!
8. DIY Convertible Storage Cube Seat
SUPPLIES
4 18x18 planks, 1-inch thick
2 16x18 planks, 1-inch thick
Wood glue
INSTRUCTIONS
Assembling The Cube
1. Make the perimeter of your cube by using wood glue to attach two 18x18 planks and two 16x18 planks. Once the wood glue is dry, reinforce the glued areas with nails every 2 inches.
2. Apply glue to the edges to the wood and place a 18x18 plank on top. Once the wood glue is dry, reinforce with nails.
3. Sand down the entire cube.
4. Wipe off any debris left from sanding.
5. Prime, stain and seal the wood.
6. Screw 4 wheels to the bottom of the cube.
Creating The Cube Lid
1. Repeat steps on a separate 18x18 plank.
2. Create a seat cushion by using spray adhesive to attach a 16x16 piece of foam to a ¼-inch thick piece of wood.
3. Upholster the cushion with durable fabric and a staple gun.
4. Map out a 16x16 space in the center of the 18x18 piece of wood.
5. Sand slightly, wipe away the excess shavings, and add glue the upholstered cushion to the 16x16 space on the lid. Allow 24 hours to fully dry
8 Easy Ways To Add Storage To A Small Living Room ─ BuzzFeed Nifty

<style>.embed-container { position: relative; padding-bottom: 56.25%; height: 0; overflow: hidden; max-width: 100%; } .embed-container iframe, .embed-container object, .embed-container embed { position: absolute; top: 0; left: 0; width: 100%; height: 100%; }</style><div class="embed-container"><iframe src="https://www.youtube.com/embed/XMEIJxJ_Clw" frameborder="0" allowfullscreen></iframe></div>